Pages

Friday, September 5, 2014

Give me a Brake!

I have some news...

My beloved Airborne Seeker has been having a little problem with the Elixir 1 brakes. Basically, whenever the bike would sit out in the sun, the rear brake locked up. After letting the bike "cool" down in the shade or basement, it would return to normal. It only happened a couple times this summer, however the last event resulted in a small fluid leak at the lever. I was not happy considering I had owned the bike less than a year. Figuring, it might just be a bad factory bleed, I took it to my LBS. They informed me that it would in fact need new seals in addition to bleeding. On top of that, they said it would cost around $50 total and a week to get the Avid seal kit shipped...
I figured I'd test out Airborne's great customer service reputation and see if this could be covered under warranty. Within an hour of emailing Airborne, they replied back letting me know they contacted SRAM and were awaiting a reply. I waited roughly a week without update and decided to fire off a curious email to Airborne. Sure enough, a speedy reply informed me that SRAM had sent out replacements and a pre-paid label to return my leaking Elixir. I was impressed to say the least...fairly quick responses, no hassle, no questions, free replacements. A few days later, the package arrived, with two surprises...

Surprise #1: Upgraded replacement brakes! I received the newly re-designed DB5 model (lower tier versions of the new GUIDE series) including (2) of the new "centerline" rotors!!

Surprise #2: The second brake in the box......a DB3??? wait a minute, who runs different brakes on the front/rear?? A 3rd email to Airborne revealed that it was indeed a mix-up at SRAM, and a rep emailed me back letting me know that a second DB5 was on it's way.

Eagerly, I unpacked the DB5 and installed it in the place of my leaky Elixir...and quickly noticed that the hose was too long for my Seeker. This meant that I would need to cut and bleed the line before I could go riding. I could have brought the bike to the LBS and paid to have it bled, but then in a couple days I would have to do it all over again once my front DB5 arrived from SRAM. Since I wanted to ride the bike NOW, I opted to bite the bullet and go buy an Avid bleed kit. I figured it would come in handy in the future with my Yelli Screamy build.

All in all, I have to commend Airborne as well as SRAM customer service throughout my issues. They provided fast, helpful responses and quickly shipped out replacements without question. I will keep everyone updated as I test out these new SRAM brakes (gone is the Avid name from the new design), and try to post up a review here soon.

Ride safe!


Friday, July 18, 2014

Project Yelli Screamy Update #2

I've got good news and I've got bad news...

First, let's get the bad news out of the way. The project has been going slowly, and will be getting even slower over the next few months as I have opted to divert my funds to rebuilding my motorcycle engine for more power...I'd go into detail but i suspect you are reading this because you're interested in mountain-biking, not motorcycles.

OK, now that that's out of the way...the good news! If you've been keeping up with me. I've got a good portion of the bike build out of the way. The next few components (namely the wheels and brakes) are a bit pricier than some of the smaller stuff. It will take some time for me to get the funds together and hopefully the Flow EX wheels to be back in stock.

I ran across some more sale items on JensonUSA the other day...and ended up purchasing a SRAM X9 Type 2 (clutch) rear derailleur and SRAM PC-1071 chain to go along with it. Next, I will be ordering the X9 shifter and shift cable kit and my drive-train will be complete! I can't wait to get it all bolted up and adjusted. The key component here is the front wheel, as the Manitou Tower Pro fork I picked up back in spring has a 15mm QR axle. Aside from that, if I get impatient, the rest of the components can be "borrowed" from my Airborne Seeker. I don't plan on using the Seeker as a donor, but we will see as time moves along... :)

Thursday, July 17, 2014

Growing Pains - Airborne Seeker Update

So I've been putting some miles on the Seeker lately and figured I'd do an update to let everyone know what I think of the bike and what I've been learning...

My wife and I have been riding some local trails lately. I forgot to mention that we picked her up a Kona Tika from the local EMS. We had a hard time finding a bike to fit her as she is 5ft tall. Luckily for 2014, Kona made the Tika in a 13" frame which worked out well for her size. I'm impressed by the bike and how well it's setup given its a sub $1000 rig. It is her first real mountain bike so, she is stoked as well.

I also had a chance recently to ride Millstone trails in VT with a friend of mine who lives only a couple miles from the trail system. Beautiful views and naturally air-conditioned rock formations which really made the ride perfect! I did have a little incident on a steep decent where I hit a rock/root section and ended up going over my handlebars...Walked away with a scraped knee and minor cut to my hand. Glad I had my helmet on and needless to say, I put an order in for some Fox Launch Pro knee pads! Look for a future review of those...

On to the Seeker! Don't let the title fool you...I still love the bike. It's been great for the most part, but I'm slowly learning what I like and don't like. This is very important data that I'm applying to component purchases for my Yelli Screamy build. My latest trip to Vermont started with a 4 hour drive with my Seeker on board my new 1UpUSA bike rack. The rack functioned perfectly and was well worth the price tag. My issue began once I got to my friend's house and unloaded the bike. My rear brake was hung up and tight. The rear wheel barely moved and I couldn't figure out why. Sitting in the garage overnight the brake went back to normal. My guess is that sitting in the hot sun on the rack during the drive caused the hydraulic brake fluid to expand and clamp down on the rotor. Not really an issue with the bike itself, but I found several threads on Elixir brakes doing this. I'm now understanding why the Elixirs generate unfavorable reports...the rear has been giving me on/off squealing and rubbing. I did align the rotor when I first got the bike, but it may need further attention. This is my first bike with disc brakes, so I'll chalk it up to inexperience on my part. It does however make me consider Shimano brakes for the Yelli build.

My next issue is the cockpit. I feel the 100mm stem is too long for my taste. I also think wider bars are in my future. I'm contemplating a 70mm stem and 700mm bars as a possibility. As stated above, I had a little run in with some rocks. I feel if I had a shorter stem, I would have had my weight further back and maybe kept me from launching forward. I will never know, but food for thought.

A worthwhile upgrade prior to this trip was a WTB Speed V saddle. So far, so good and much more comfortable than the stock saddle. No surprise there.

Something else I noticed after the trip, the drive-side of the BB has a black plastic seal that covers the bearing. It seems to have slid out from the bearing and onto the crank. Again, some searching yielded that this is a common issue. It doesn't affect much except maybe crap getting into the bearing.

***Short Version (for those who don't like to read)***

All in all, not a bad report. To recap, the Airborne Seeker would benefit from a better saddle, and maybe different cockpit setup. But that is normal with most any production bike you purchase. It is mostly a personal feel thing. I would go as far as to say you may want to upgrade the brakes, but I really don't have a lot of experience with hydraulic disc brakes. Take a look around online forums though, and you'll quickly find out that Shimano brakes generate much better reviews. I will say they still work a lot better than my V-brakes on my old Iron Horse.

Stay tuned for more!

Wednesday, June 25, 2014

Quick Update...with Pictures!!

I know I have not been keeping up....just got back from Bike Week in Laconia, NH. Hopefully a few pictures will keep everyone interested!

I just received my handlebars after a couple months of being back-ordered. After installing them, I can tell you it was worth the wait! I also threw on my Chromag saddle that I was previously borrowing on my Seeker. Next step is to order the wheels. Once I get those on, I'll focus on the drive-train and brakes......doesn't help that it's motorcycle season!

I also wanted to show off my new bike rack....the ever popular 1UpUSA Quick-Rack system! I'll try and post up a detailed review once I get a chance to really use it.


Thursday, May 22, 2014

Project Yelli Screamy Update #1

I know it has been a while since my last post....work has had me traveling a bit. I've been slowly but surely getting the Yelli put together. As of right now, the front end is all together, just waiting on my handlebars which were back-ordered and are slated to arrive in mid June...

Meanwhile, I'm focusing on wheels, brakes, and the drive-train. The only thing holding me back is $$ right now. I will say, not being able to just purchase everything all at once has made me hunt down some parts and find some pretty good deals. If you look enough and wait long enough, deals do come around.

-Price Point had a great deal on the Manitou Tower Pro fork. Being a 2012 model, it was half-off! I paid $250 for the 140mm fork with a 15mm qr axle. I was stoked!

-Also, I found a discounted price on last year's Chromag Lynx saddle on Amazon. For $45, I received Chromag's leather saddle with titanium rails! Glad I looked around as I was just going to go with a $40 WTB saddle.

-Lastly, I scored big on Ebay when I was ready for a single chainring for my X9 cranks. I was going to buy the Wolftooth Sram direct-mount 30t ring from their website for $78. I know they are worth the money (made in USA) but it was still a lot to swallow for a ring. Just out of curiosity, I decided to check Ebay for some prices. To my surprise, I found one search result which was a used 30t Wolftooth chainring just like the one I was going to purchase. This person was selling not only the ring, but had the bashguard, and mounting bolts with it. I looked on Wolftooth Components website and priced it all out...$78 for the ring, $47 for the bashguard, and $15 for the bolts....I ended up winning the auction for $36 plus $8 shipping.....now that's bargain hunting!

Monday, April 14, 2014

Tool Time!!

In my earlier posts, I mentioned that there are some bike-specific tools that are highly recommended and in some cases required to assemble a bike yourself without the use of your local bike shop. I have made and purchased a few so far. Here are my thoughts...

Headset Press: Park Tool makes 2 different models costing roughly $75 and $150. This tool is used to press the headset cups into the head tube of the frame. With very little searching online, I found many DIY pages on how to make one yourself using hardware from Lowe's. All in all, it ended up costing me around $20 to make. Not bad. If you really want to cheap out, I have actually had luck using a piece of 2x4 and a mallet. I did this back in college with my old Iron Horse bike. However, I really don't recommend this...especially if your going with a high end frame and a costly headset. If your spending good money on quality parts, only to use the cheapest methods/tools, it really makes little sense. The press I made, worked pretty well, but not perfect. It did get the job done and was easy to buy the parts and make. I recommend the DIY route if your only building one bike and most likely will not do it again....but after doing both of the cheaper methods, I have to admit, it seems like it would be worth just buying the Park Tool press if you plan on doing several bikes over time.

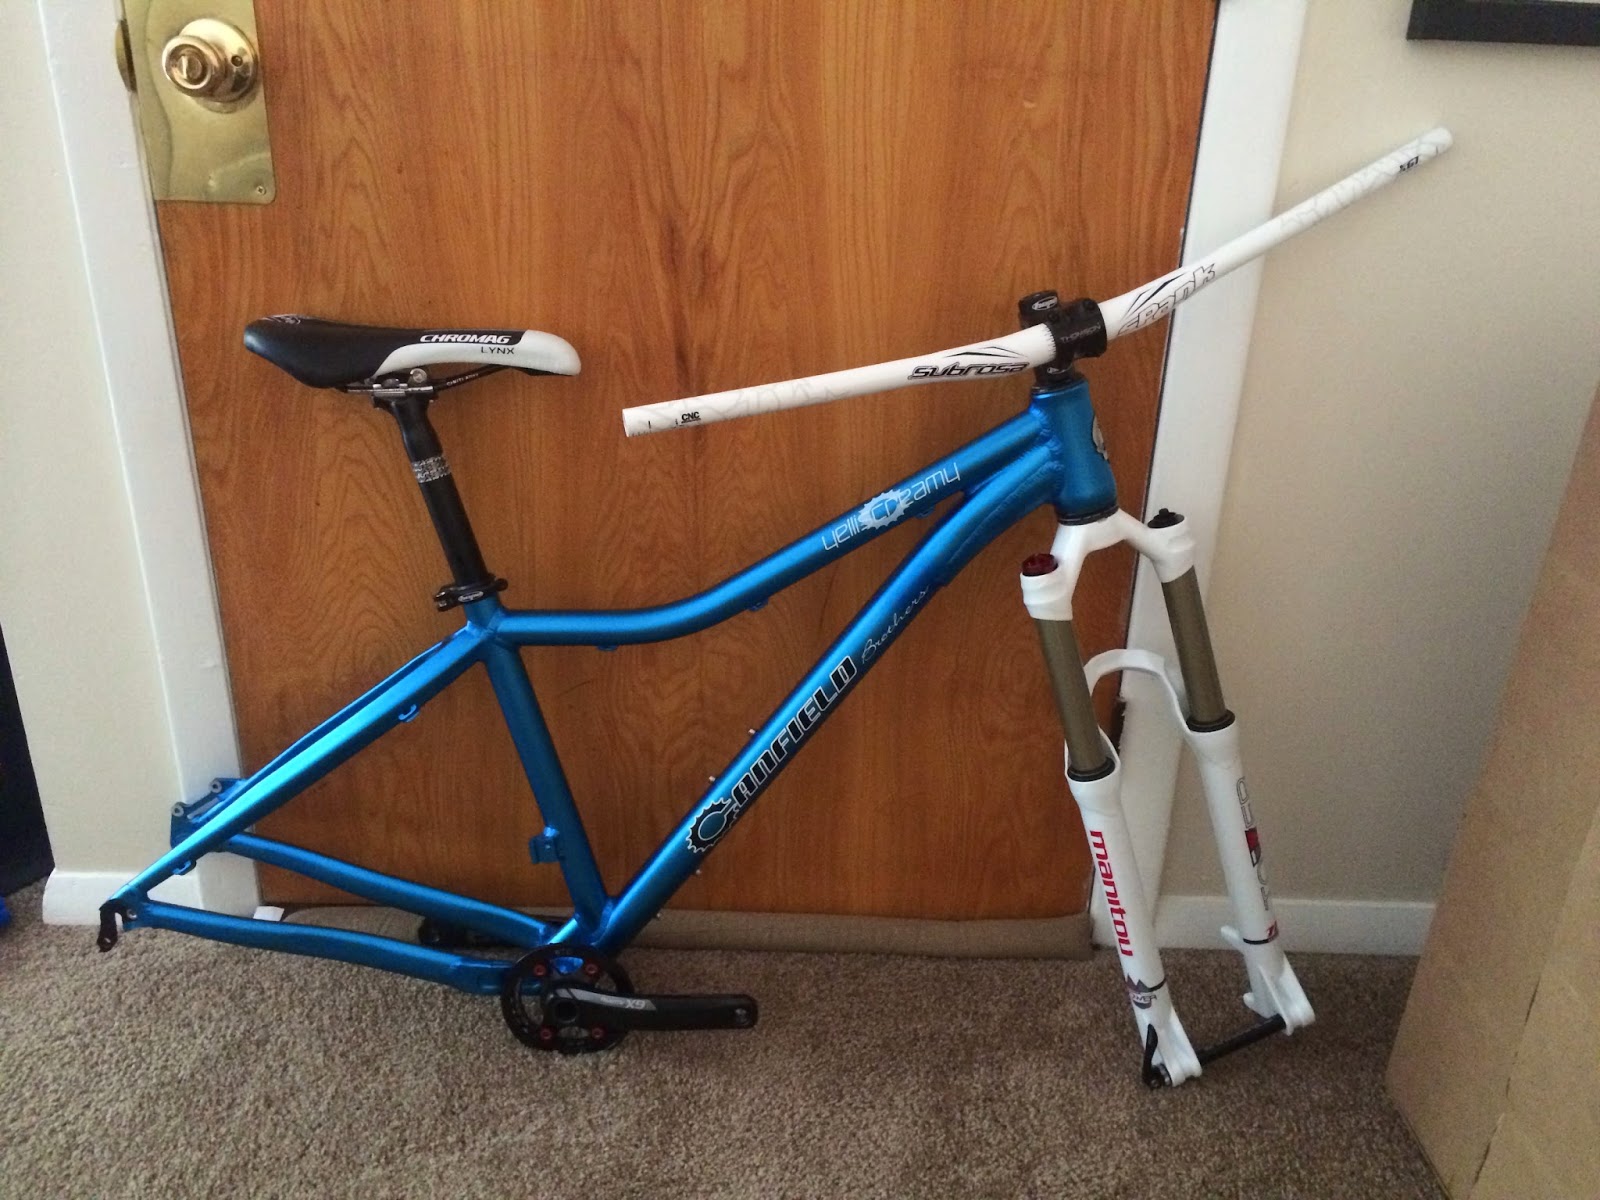
Crown Race Setter: Again, Park Tool makes one of these as well as other companies. It is essentially a pipe with one end closed and it slips over the fork tube. You slip on the crown race, then the pipe and with a hammer, tap and press the crown bearing race down to the crown of the fork. In this case, I went the DIY route as well. In the past, the standard has been 1-1/8" steerers. If your bike has one, you can simply go out and purchase a piece of 1-1/4" pvc pipe. In this case, my Yelli like many new mountainbikes, is using a tapered tube with a 1.5" dia crown. For this, I purchased a 2ft piece of 1.5" schedule 40 pvc. Just like the higher end tools, you slip it over and hit it with a hammer until the crown race is seated. Worked like a charm! For the $2 or so it cost for the pvc, I highly recommend this over buying the specific tool.

Bottom Bracket Tool: Next up is the socket specific to threaded bottom bracket cups. This tool is somewhat unavoidable. For a threaded BB, you simply thread the drive-side and non drive-side cups into the frame by hand until they are snug, then you put the said socket on your rachet (or torque wrench in my case) and torque it down the required specs. Now, I've heard of people using a rag and channel-locks to torque it down, but that really doesn't sit right with me. Again, if your buying higher-end parts, why marr it with the wrong tool. In my case, I'm using a SRAM GXP BB, which similar to Shimano, has 19 splines around the circumference. This socket is precision machined and slips nicely over the cups and snugs them down to spec with my torque wrench. The socket cost me around $20, so not super expensive. Worth it in my eyes. (Part# BBT-19)

**If your bike/frame uses a press-fit bottom bracket, you will not need this socket and instead, use a headset press discussed above.

Star Fangled Nut Setter: This one, I just purchased. A lot of people simply install the star nut with a screw-driver. Your really just driving a one-way nut down into the steer tube. Is this tool necessary....not really, but for $20 it gives me piece of mind as it hammers the nut in exactly 15mm from where you cut the tube. This one is really up to you. If your like me and precision allows you to sleep better at night...just buy it. It's something you'll probably use again if you buy other forks. (Part# TNS-1)

Pipe Cutter: This is needed for cutting down the steerer tube, handlebars, and seat tube if necessary. The other option would be to use a hack-saw and cutting guide. In my experience, it is very difficult to make a nice clean STRAIGHT cut using a hacksaw without a guide. So, you can buy Park Tool's cutting guide...or just buy a pipe cutter. I chose the latter, as I had it laying around from when I cut down the steer tube on my Iron Horse a few years ago.

Chain Whip: This is really only needed for install/removal of your cassette from the free-wheel/hub. Looks like a flat handle with a short length of chain attached. The chain grips the cogs on the cassette to keep it from spinning and allowing you to tighten/loosten the cassette. Handy to have in your tool kit.

Chain link Tools: I'm putting these together, but there are two separate tools here. One is a chain-breaker. This is used to install/remove the rivets/pins in the chain links to break a chain or assemble it again. It is essentially a small press that presses the pin in or out of the links. The second tool is a set of master-link pliers. Most branded chains now use a "quick-link" and have their own marketing name for it, but essentially there is one "master link" in the chain that is the point to disconnect or connect the chain. I purchased Park Tool's version (MLP-1.2) that makes quick work of breaking the chain for removal/cleaning. You can get buy without these and use a pair of needle-nose pliers to squeeze the link, but for the $14 or so I paid for the pliers, it just works better.

Allen Key Set: For most, Allen keys or wrenches are something you most likely already have. I wasn't sure if it was worth mentioning, but if your new to biking, you NEED to get a set. They don't have to be fancy or expensive either. Most local hardware store's should have a set of METRIC allen keys ("L" shaped). You can also get them with handles or a set of Allen sockets to be used with a ratchet. Just about every part of a bike has allen-head bolts. You can pretty much remove, adjust, install 95% of a bike with these and they are a must if you plan on doing any maintenance.

Unless I'm forgetting something...that should really be the minimum required/recommended tools. Feel free to drop me a message if you feel I should add something. Thanks for reading!

Thursday, April 3, 2014

R.I.P. Front Derailleur...

Well, its not exactly dead and gone...but it seems as though the front derailleur is becoming an endangered species lately. More and more rider's are choosing to drop their front mech from their rigs, and I can see why. You see, I'm a firm believer in the KISS principle. Keep It Simple, Stupid!

The concept of a 1x drive-train is not exactly new. Many free-ride/downhillers favor the simplicity of less gears and less chances of dropping a chain during rough descents. Aside from those benefits, it can reduce the weight of a bike since you're ditching the front mech, shifter, cable, and extra chain rings. There are still many people who use and like 2x and even 3x drive-trains and wouldn't dream of losing their front mech. I'm not knocking those who want a plethora of gears, but for my application, 1x10 works and keeps my rig simple and saves a little weight in the process.

So, my first steps for this frame-build is to get a crankset/BB....SRAM makes some trick spider-less cranks. Their X9 and up cranksets have 3 torx bolts holding their spider/chain ring setup to the spindle. You simply remove the 3 bolts, spider, rings, and then bolt up a new single ring chain ring of your choice (and tooth count). This goes along the same lines as the rest of rest of my setup...simple an clean.

What I've ended up with so far...is an X9 crankset with hollow forged crank arms and GXP bottom bracket. The plan is go to with a Wolftooth 30 tooth chain ring which they happen to make in a SRAM style direct-mount (remember the 3 torx bolts??). Also going to be purchasing X9 rear derailleur (type2 clutch) and X9 shifter to round out the group. I will try and update once I get more parts together. Thanks for reading!

Monday, March 31, 2014

The Yelli Has Landed!

My frame has arrived...in all its screamy-blue goodness! The pictures do a pretty good job of showing off what nice color it is. Canfield Bros. offer this frame in a few different colors and they seem to add a couple with every new batch. I originally wanted wasabi green anodizing, but they were out of medium frames in that color at the time I ordered...oh well I think the blue is sweet! I'm used to bike frames being painted or powder-coated, the anodized frame is new for me and I'm glad I went with that over their powder-coat finishes.

So now, that it is here...there is a lot to think about as far as what components I want and what I want from the bike itself. I've already spec'd out what I want for a headset and pretty much have my heart set on doing a 1x10 drive-train. The most expensive components will be the wheelset, fork, and brakes. That means I will have to do some serious research and make sure I know what I want and hopefully find some deals...

Stay tuned as I go over each of the major components I end up purchasing and the reason behind them. Should be informative.

Tuesday, March 25, 2014

Yelli Screamy ! ?

As usual, I was on MTBR forums and found myself browsing through a photo thread in the "all-mountain" section. Specifically, it was members posting pics of their AM hard-tail rigs. In the past, I've always associated AM with a full-suspension bike and would never think of riding a hard-tail for anything more than cross-country riding. I was wrong. Turns out, there are quite a few people running HT bikes pretty aggressively and several manufacturers producing slacker HT frames meant for longer travel forks and abusive riding.

Looking through the pages of bikes photos that were posted, one particular bike caught my eye due to the frame itself as well as the name...Yelli Screamy. Lets face it...most hard-tail frames look pretty much the same. It's a generic metal tube frame consisting of triangles, a seat post, and a fork. But there was something different about this frame...the bend in the top tube, the short chainstays, it just stood out among the rest of the bikes I was looking at. So, from there I of course had to look into the bike and see what it was all about. The Yelli Screamy is made by a company consisting of two brothers....the Canfield Brothers. They produce a range of frames from downhill to trail and have begun producing other components including cranks, pedals, and wheelsets. Most of the articles I could find on the Yelli Screamy produced glowing reviews and quite the following as a great handling trail/all-mountain hard-tail. It boasts one of the shortest chainstays (16.7") on a hard-tail frame, and is advertised as a "29er that handles like a 26er". Back when 29er's first started appearing, many critiqued their handling as less precise and awkward. The Canfield Brother's have claimed to change this with a more playful frame geometry. From all that I have read online, this claim seems to be true.

So is this the bike I've been looking for? Well it's not full-suspension, but it is also much cheaper than a full-suspension frame. The big question is...do I really want a full-suspension bike? In general, a HT is lighter, cheaper, stiffer, and simpler than a full squish bike. What does this mean? Well, it's all subjective, but less maintenance and service as well as less to go wrong when your on the trail is a big plus to me. Better climbing is a plus also. I've always heard that a HT makes you a better rider...

Needless to say, I bit the bullet and decided to buy the frame and try my hand at building it up!
To be continued.....

Monday, March 24, 2014

The case for building a frame...

I've tossed around the idea of building up a frame instead of buying a complete bike. What are the advantages? disadvantages? How involved is it? So I set out to do some research (as always) and try to find some answers.

**If you want the short version, scroll down to my bullet list below**

So my initial thought was building a frame up must me cheaper than buying a complete bike. Right? Well, not really. In most cases, it ends up being more expensive. There are exceptions, such as some people take their time and scour the internet for clearance/sale items and other deals on new and used parts in order to keep the overall cost down. Other people use bike components from bikes they already own. Swapping/transferring parts between bikes can make a lot of sense if you own several mountain bikes. In most cases, your going to build a frame the way you want it built and with the parts you want, not just what comes on a bike you see in the store. This usually ends up being higher priced components.

My next question was what tools/specialty items would I need as I don't fix/assemble bikes regularly. Turns out, most of the bike can be build with common hand tools. There are a few specialty tools that make life a lot easier, but not always necessary. I've found some cases where local bike shops are willing to help you out with certain steps for a small fee as they already have most of the tools. There are several "tools" that you can actually build yourself using parts found at the local hardware store. The internet is your friend here, many DIY pages and videos explaining a lot of useful information.

Is there a lot of research/knowledge involved?? I have found that as long as you have a basic idea of what you want out of the bike and are willing to ask/receive advice from forums, manufacturers, etc. you should be fine. As I found, if you don't know something, look it up! Frames will usually list out all the specs for what you need to build it up. Just be patient if it's your first time and make sure your buying the correct parts.

SHORT VERSION
Advantages:
  • Exclusivity of bikes that are only offered as frames, not complete bikes
  • You build it exactly how you want it / specific combination of components not offered
  • It can be pieced together over time as funds allow
  • Take advantage of online sale/clearances / Ebay used parts
  • Can use parts from existing bikes (provided you have other bikes)
Disadvantages:
  • More expensive (usually) than buying a complete bike
  • Requires that you know what parts work together and what you need/want
  • Can require certain specialty tools that are not always cheap


Sunday, March 23, 2014

Give me some slack!

I love my Seeker...don't get me wrong. But, purchasing an XC hard-tail bike was mostly about $ or lack there of at the time. I've always wanted an All-Mountain rig that would serve me better as an all around bike to get me just about anywhere I wanted to go. The more I researched, the more I learned how frame geometry plays into a bike's handling characteristics. Putting the marketing hype aside for a minute, basic categories include: XC > AM > DH

As you move away from cross-country bikes and towards all-mountain, the basic differences are beefier frames and slacker head-tube angles. You sacrifice the lightweight, agile handling of the XC bike but what you gain is a more robust design that descends as well as it climbs. This is what I wanted.

As it turns out...I'm not the only one dreaming of a slacker HT bike and Airborne has been listening. They had been developing a more trail-oriented version of their Goblin XC bike. Just recently they started selling this new bike called the Goblin Evo. I could go into all the specs, but your better off just checking it out on their site. As with all of Airborne's bikes, after looking at the components on the Evo, it is easy to see what a great deal the bike is. If I hadn't just purchased the Seeker a few months ago, I would most definitely save up to buy the Goblin Evo. I know it sounds like I work for Airborne, but seriously, compare any of their bikes to the competition...actually even easier, they do it for you! On their site, they provide a quick component comparison between their model and the leading brands.

There are a ton of great brands out there...Trek, Giant, Specialized, Kona, Santa Cruz....all make awesome bikes, but for those of us who don't have $2,000+ to spend right now, Airborne has many affordable options.

Until next time...
Over and Out!

Friday, March 21, 2014

Airborne Seeker 29er - Initial Thoughts

Just to recap from my previous post...my initial impressions are that this is a phenomenal bike at an even better price. I was about to purchase a Trek X-cal 8 and after a ton of research, it was clear that the Seeker was a much better buy. If you look at them side by side, they are really very similar (same goes for Giant, Specialized, etc in the same price range). Right off the bat, the Seeker comes equipped with a RockShox Recon Gold air fork and Avid Elixir 1 hydraulic disc brake set. It is actually similarly equipped to the top of the line X-caliber that is $1700msrp. In addition, it comes with a tapered head tube, 2x10 drive-train and hydro-formed frame (not so with X-cal 8). Some may not care about these features but they are what everyone else is now equipping their bikes with, however at a much higher price point. As far as I can tell, the Seeker/Goblin frame is pretty damn close if not equivalent to the big name brand HT frames. All that for $930! (+75 shipping)

As far as assembly, all you need is a basic Allen-wrench set (metric). The bike is probably 80% assembled on arrival in the box. Basically, you insert the wheels into the dropouts, thread the quick-release skewers through the hubs and clamp. Wheels done. Next, spin the stem 180 degrees and clamp the handlebar down in the stem. Lastly, tighten everything and adjust/fine tune the derailleurs and disc brakes. This is all really basic and there are a ton of videos on YouTube that can walk you through any of this if need be. The whole process should only take a couple hours (including the tuning).

Oh, one last thing...pedals are not included. You will find this common with higher end bikes as most riders are very specific on what pedals they want or need and most times swap pedals from one bike to another. Most manufacturers don't bother including cheap pedals that will most likely get tossed...


New Ride!

So...I had my heart set on a Trek bike. I had always associated high quality mountain bikes with the Trek name and knew they came with higher end components, but you tend to pay more for it. Naturally, I started my search with Trek's website. Now I went into this knowing I had a limited budget (around $500 or so), but still wanted to see what I could get for my money. I quickly learned that most entry level mountain bikes start around the $1000 price point...and most decently equipped bikes go up quickly from there. Luckily, Trek took their XC hard-tail model the "X-Caliber" and broke it down into 7 trims ranging from their full-fledged model ($1700) down to the "X-Cal 4" which comes in at a modest $550. 

As I spent time glossing over the specs of each model and comparing them, it became clear that the more bike I could afford now, would lead to less of a need to upgrade the "barely trail capable" components of the lower end models. This landed me on the X-Cal 8 model for $730. It would get me close to what I wanted without blowing my budget and leaving room for upgrades in the future. I pretty much had my mind made up until I did some research on the MTBR forums...

I ended up running across a newer bike manufacturer called Airborne Bicycles. They make and sell bikes that cut out the "middleman" (local bike shops) by only offering their bikes through their website and mailing them directly to you. This means a few things....

1. Your purchasing a bike sight-unseen. You can't take it for a spin around the parking lot at your local shop and see how it feels or contemplate frame sizes.

2. There is some assembly required. To be honest, it's really minimal and pretty much requires you to be able to turn an Allen wrench...but I know there are people out there who cringe and gasp at the idea of doing a tune-up on their bike.

3. There is no "authorized" retailer if you have an issue. Since it is online based only, you will have to deal directly with Airborne through email and their website. Again, to some people this may or may not be a deal breaker.

Ok, so now that that's out of the way...what caught my attention? Airborne has their own section on MTBR forums and they are constantly being talked about in the "beginners corner" as well. I read a ton of great reviews, info, and excitement about Airborne's bikes...so I went to their site to look. At the time, they made a handful of XC bikes, but what was astounding was the value! The prices were great, and the components they were including for those prices was even better! I jotted down some of the specs and prices and compared them to the Trek models I was looking at...the Airborne models were shaping up to be even better deals that I had thought.

Taking the Trek X-Cal 8 model I had wanted and putting all the specs in a spreadsheet side-by-side to Airborne's Seeker model really opened my eyes. The Seeker was roughly $200 more than the trek, but the components were a definite upgrade. To be honest, many of the features/specs of the Seeker were found on Trek's full-fledged model X-Caliber that retails for $1700!!! The Seeker...$929 (plus shipping).

Needless to say...I bought the Seeker. More info to come. Stay tuned.

Wednesday, March 19, 2014

Getting started...

This blog is being created to follow my progress as I get back into mountain-biking and plan on building up a frame. A little on my background...the last bike I purchased was many years ago....1999 or so.  I ended up purchasing a 1998 Iron Horse G-out. It was a full suspension bike with mostly bottom-end components but for the price ($400?) it was a decent bike to get me around and play around on the local trails.

Some years later, I was in college and decided to bring my bike out with me to ride around. I decided to do a few upgrades including clip-less pedals, and a new suspension fork. Both upgrades were used parts, but still much better than the coil fork and cheap pedals that came on the bike originally.

...Fast forward to about a year ago....I started looking into newer bikes...it didn't take long to realize how much things have changed since I bought my Iron Horse. Frame designs are better, alloys are better, suspension is much improved. Wheel sizes...last I knew there was the 26" wheel.....then came the 29" (or 29er as its referred to), and now 27.5" to split the difference. Tapered head tubes are becoming more common, carbon frames are trickling down to the more "affordable" price ranges. Oh and gearing has changed quite a bit as well. My old Iron horse from the 90's had a 3x7 (21 speed) drive-train...since then, bikes have progressed from 7 speed to 8, 9, and now more commonly 2x10. Even more recently, SRAM has created the 1x11 drive-train. As always, these technologies start out on the higher end bikes and slowly trickle down over time.

This left a lot for me to think about when looking for a new bike...As you will see in future posts, several things led me to my new purchases.